Pages

Showing posts with label making. Show all posts

Wednesday, April 6, 2016

diy aquaponics pdf plans | Making smoked foods Original rib ideas 0 Plagiarism 1

diy aquaponics pdf plans


I just found out that my "Luxury cut ribs" idea wasnt original.

It seems that not only is there a competition BBQ circuit, but on it you might find something called "Hollywood cut ribs" which have an uncanny resemblance (being identical) to Luxury cut ribs.

Oh well.

Im still holding out hope for Frenched luxury cut ribs as my one contribution to the carnivorous, and our deep-seated need to cook stuff on charcoal.  


Do you find information about diy aquaponics pdf plans are you looking for? If not, below may help you find more information about the diy aquaponics pdf plans. Thank you for visiting, have a great day.
Read More..

Saturday, April 2, 2016

diy commercial aquaponics | Aquaponics

diy commercial aquaponics


Got 2 x 80ltr  containers today to start my aquaponics system.
I have never done anything with this before so I ordered the DVD from Murray Hallams Aquaponics made easy
I placed them where i will start this project in my conservatory filled with water and added some plants i got from the pet store.
I will post as i proceed with this and after I watch the DVD but I hope to have some Jade perch going in my tanks.


Do you find information about diy commercial aquaponics are you looking for? If not, below may help you find more information about the diy commercial aquaponics. Thank you for visiting, have a great day.
Read More..

Thursday, March 31, 2016

diy classroom aquaponics | Handmade fishing lures Mold making Prototyping plastic

diy classroom aquaponics


I just discovered my new favourite substance.

Its even better than PVC.

Maybe it is PVC.

I dont know.

I was in my local electronics store checking switches, and was sold some of this stuff.

Its plastic that you can warm up and shape.

You need to get it to around 65 degrees c before it melts into itself.


Once hot, you can shape it into anything you can think of.

Pictured here is a bit I squeezed.

It retains fine detail like fingerprints, and when dry, it sets white like the beads again.

It sets to a strong plastic with a little flex, a lot like a soft drink (soda) bottle cap.


My first use was to make a very specific battery pack that didnt exist as far as I could tell.  Its great to work with, and totally recyclable. You just drop it back into hot water, and it re-melts.

I would guess you have around a minute to work with where you can press two bits together and they form one. And perhaps another minute where you can still shape it, but pressing two bits together wouldnt quite become one.

If you need more time to work it, you just put whatever youve half made back into hot water and it softens again.

Very cool stuff that I think Im going to need to buy in bulk.


120 Things in 20 years is excited about making handmade fishing lures, and just general prototyping  In reality, I have no idea what Ill do with it, but its exciting just knowing about it. Im easily excited.


Do you find information about diy classroom aquaponics are you looking for? If not, below may help you find more information about the diy classroom aquaponics. Thank you for visiting, have a great day.
Read More..

Wednesday, March 30, 2016

diy aquaponics basement | Making smoked foods Luxury Cut Ribs

diy aquaponics basement


I have a hot tip for making ribs.

Its very simple, but it always pleases.

I call it Luxury Cut or sometimes Lux Cut.

All thats required is just before serving, you remove every second rib bone, so that the ones on either side get double their share of meat.

Total luxury.

Ask your butcher to do it for you. Tell them to just throw the removed bare bones onto the scales as well so you still pay the correct amount. If you do, they probably wont charge you any more for the preparation time. Turn the bones into stock or whatever. Always go to your butcher during non-peak times.

I promise you will never go back (not to the butcher, youll go back to the butcher. Just not to normal ribs)

And sorry to any Vegetarians reading.

Do you find information about diy aquaponics basement are you looking for? If not, below may help you find more information about the diy aquaponics basement. Thank you for visiting, have a great day.
Read More..

Tuesday, March 29, 2016

diy aquaponics plants | Obvious Photo Editing at Top 200 IAPLC 2012

diy aquaponics plants


Spotted obvious photo editing at Top 200 IAPLC 2012

Original picture from IAPLC web site (tank #65), look that top left corner red box

200% zoom

It is amazing how IAPLC committee actually miss it.

Update 12 July 2012: It was reported here that it was dues to some anomaly during upload. Below is the animated gif from the website.

However, my guess is the submitter was play around with the idea of nana all the way to the top. He made a rough edit to see how it will look. Unfortunately during submission, he submitted the wrong file....oops....

Im saying this because there should be error correction or parity check or CRC check during data transfer.


Do you find information about diy aquaponics plants are you looking for? If not, below may help you find more information about the diy aquaponics plants. Thank you for visiting, have a great day.
Read More..

Thursday, March 24, 2016

DIY Aquaponics | Making smoked foods Frenched luxury cut ribs

DIY Aquaponics


I thought I was pretty clever when I came up with cutting ribs so that ever second bone was removed. I called it "luxury cut ribs". This is always enormously popular with people at a BBQ.

But now I think Im even more clever.

Cleverer.

I frenched every rib, but at opposing ends.

Luxury cut, but with a handle.

A genuine meat popsicle.

Bam!


Do you find information about DIY Aquaponics are you looking for? If not, below may help you find more information about the DIY Aquaponics. Thank you for visiting, have a great day.
Read More..

Monday, March 21, 2016

diy aquaponics bacteria | Making smoked foods Tin can smoker

diy aquaponics bacteria


As far as I can tell, everything worth eating, is worth smoke curing.


As a result of a gift from my other mother, we have one of these in our yard.

Shiny!

And poorly photographed!

"Poorly photographed", is a new style Im exploring a bit in this post.


A gas BBQ is all well and good, but as part of the move to gas, we tend to miss out a bit on the flavours that woodsmoke can provide.

Gas = good

Wood = good

Gas AND woodsmoke = amazing!

An extremely important part of this "Thing" is the humble tin can. I say humble, but Im not really sure if a tin can actually does humble.

Im guessing a tin can mostly does tin can things.

Lurking springs to mind.

Shinning might also rate a mention if its a fresh one.

Mines a fresh one.


Shine can, shine.

Lurk can, lurk.

A tin can can also have holes punched through it with an old mini-screwdriver, but Ill get to that a bit later.

For now, Ill introduce the backbone and or possibly un-necessary briquette.

Backbone, because it provides the heat that drives the smoke.

Un-necessary, because it might not.

I cant really tell what contribution this stuff made, other than it was used, and the result was good.

I also dont know enough to endorse any product you might see in this post, so take everything I say as you always should, with a grain of bacon salt.


Now is probably a good time to say that none of this stuff is my idea or anything (except perhaps using a screwdriver as a drill, and then enlarging those screwdriver holes with a bigger, thicker screwdriver ) but rather, its a collage of everything Ive read over the last few days, and the implementation is based on trial and error in real time, bizarre ritual, and risking tonights meal.

DO try this at home. (except maybe the bit about ramming a screwdriver through a can of burning coal)

Anyway...

The briquettes look like this up close.

They look like brown coal, but I suspect they are made of more recent trees. Checking...

Ok... well it seems the packaging reads "Not suitable for barbecues. Probably something I should have read before buying it. Perhaps it shouldnt have been displayed in the BBQ section of the hardware I bought them from.

You live and learn.


I hope this isnt what made todays smoking such a success.

I have no idea whats in these things, so please dont use them unless you find out, and then please tell me what they are made off so I can seek whatever medical attention I might need.

Im sure Ill be walrus.

Anyway...

other things to show and tell, include hickory chips.

I ended up using around two cups for my two chicken thighs, but Im guessing it would make no difference how much stuff I put in the BBQ. It would still take around two cups.

Two chicken thighs in a BBQ is a total waste of energy, but I didnt want to waste too much food if it all went wrong.


I also bought some fire starter cube things to get the briquettes that are unsuitable for BBQs alight.

I have no idea what these things are made of.


If I ran an unscrupulous country that wanted to get rid of its toxic waste, Id just shape it into things and export it as products.

Outdoor furniture and so forth.

So, I smacked a few holes in my tin can with a rusty old mini-screwdriver thing.

I knew it was sharp enough for this task, because every other time I use it for a task it wasnt designed for, I manage to gain a body piercing of a part of my hand that was never designed to receive such a thing.

This time I hurt nothing but the can, because it turns out cans are pretty thin.

Confident stabs make smaller dents in the can, and cleaner holes.

Stab confidently.


I punched two extra holes at the top to thread a loop of wire through to act as a handle.

Probably not required, but I did use it at the end of the day to pick it up and put it under a water tap to make sure any leftover fire was safely out.

So... add a handle if you have a handy coat hanger or length of wire.

Pliers also work as a handle.


It took way too long to get the briquettes going because there was clearly not enough oxygen getting to them.

The flames were there, but they started at the top where they met fresh air rather than at the fuel where a fire should be.


So I "extra safely" punched a few more holes through, then made them bigger with a thicker screwdriver.

It turns out its probably not a good idea to do this when its burning, but it worked out fine in the end.


The fire took on a much more healthy glow, and I held back on adding too many holes to the lid, because I figured I might need to damp the fire down a bit because I want smoke not flame.

You cant really see it in the pic, but the flame actually looked like it was coming in through the holes at the bottom. Like an inside out gas burner. Like the fuel was gasing, and the flames did what they did to seek the oxygen.

Interesting. And a pretty handy tin can stove.


To be honest, I dont really understand why this was burning like I wanted it to when I wanted to get it alight, but then settled down to what I wanted it to do when I wanted smoke.

All the photos above include flame from the fire starter things, so perhaps its just a case of them burning with a bit more gusto than the heat beads and wood chips.

Or it could be the water soaking of the wood chips.

Did I mention that? The wood chips were soaked in water boiling water for a few minutes before being added to the tin can with the glowing briquettes.

I suspect they dry out before they start to smoke, so perhaps its just to stage the wood chips so they dont all go up in flames at the same time. As far as I can tell, it should be possible to either make them burn in stages by wetting them, creating only a small section at any one time thats dry enough and hot enough to start smoking, OR restrict the airflow and choke them to whatever combustion rate you want.

Perhaps the water soaking has some other reason. Ill let you know if it turns out to be important.

Smoke!

Lots of it.

I didnt push the number of holes, because I didnt want it to go to flame, but I got the feeling I could have made as much smoke as I wanted simply by adding more.


There was quite a bit of slack space between it burning , and it smoking. If I put out the fire, it would take a lot of blowing at the holes around the bottom to get it to flame again. (I only did this to test how forgiving it was) The result was that it seemed to prefer to make smoke rather than fire unless it was really coaxed into flame, and even then it settled back to making smoke.

Clearly it knew its designated task.

Ill play a bit more later, and theres always the lid to damp it down if needs be.  I might even add a second lid so I can turn it like a tap to adjust it. ie, a big hole in each lid, and overlap them so you can change the size of the hole.

I was concentrating on air in, but controlling air (or exhaust) out does the same thing. It probably doesnt matter which one you control, the result is, if you restrict the airflow over the coals, you restrict the burn, and control the smoke.

After an hour or so of smoke that was sometimes on and sometimes off, depending on what I was trying at the time, the result looked like this.

To be honest, I was a little disappointed.

I thought it would have a lot more smoke colour to it. Some of that colour on the bacon was there in the beginning. And this photo is actually a little flattering as far as colour goes.


But it was getting late so I lit the BBQ and brought the bacon wrapped, blue cheese, and tomato stuffed chicken thigh parcels (my best tying effort to date in my own opinion) up to an internal temperature of 75c.

Apparently I missed a step called brining. Ill let you know if it turns out to have been important. I think it involves marinating your food in a salt water solution before smoking like I had to do with the home made cheese "thing".

But the result was truly amazing!

Totally worthwhile.

My big fear is that this will be one of those beginners luck things, and that I will now spend the rest of my life trying to duplicate it.

Hopefully, and perhaps more likely, is that this is just the beginning of what is possible with smoking.

I hope so.

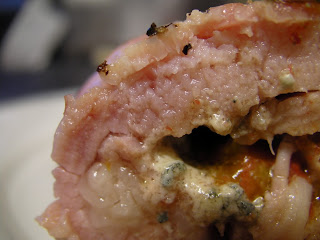
The result makes for a terrible photo, because for some reason, I went for an autopsy/science  look rather than a food look.

Never take a food cross section photo straight on.

Originally I was a bit suspicious of the pink, thinking it might be under cooked, but my digital meat thermometer said it was cooked, and it turned out the thermometer knows its stuff.


The chicken looked a bit like good bacon.

The bacon wrapped around the chicken looked like what I now call good chicken.

If anything it was actually a little over-done, but the brining step might add a bit of moisture to the final product that might counteract that.

Who knows. I cant wait to find out.

The only thing to do is learn a bit more, and do it again.

I rate this experiment with a tin can smoker a total success, and if youve ever thought about smoke curing stuff, I thoroughly recommend giving it a go.

Insanely delicious.

I hope the in(common)-laws dont read this and want their BBQ back.


120 Things in 20 years - Smoke cured stuff really rocks, and you can knock up a tin can smoker in only a few minutes.

Do you find information about diy aquaponics bacteria are you looking for? If not, below may help you find more information about the diy aquaponics bacteria. Thank you for visiting, have a great day.
Read More..

Friday, March 18, 2016

diy aquaponics south africa | Making smoked foods Mock bacon

diy aquaponics south africa


Im not really sure how to make bacon, but I can now smoke stuff, and bacon is smoked pork, so I should be able to get it half right at least.

Hope I dont die!

Actually Ive read a lot of safety info, and it seems I can cold smoke stuff at dangerous, bacteria breeding temperatures for less than four hours, without killing myself.

I think.

Dont try this at home.

Ahgggeh...

Go on.

Youll be fine.

Ahgggeh isnt a word in Australia or anything. Thats just the sound I made.

I type it as I hear it. And I hear it as I say it.

I have no idea what Im talking about.

So...

I brined two completely different looking cuts of pork that both claimed to be pork belly.

I added around a 1/2 cup of sea salt, and a half cup of brown(ish) sugar, to a squirt of honey, and some fresh ground black pepper. I also threw in three bay leaves, and Im pretty sure there was something else as well.

Its late here.

And the people next door have had enough smoke for the day so Im about to retrieve my smoked stuff.

It looks kind of pallid.

But it has an interesting scent, that might be a little promising.

Whatever happens, this will not be the kind of bacon-like substance that you might be able to put in your cellar for a few weeks. This will be the kind of thing Ill be freezing, then making sure I cook it.

A lot.

Before eating.

Which is fine by me, because I think bacon should be crunchy.

I also smoked some jalapeƱos in there.

Im off to retrieve it all now.

Ill let you know if it kills me.


Do you find information about diy aquaponics south africa are you looking for? If not, below may help you find more information about the diy aquaponics south africa. Thank you for visiting, have a great day.
Read More..

diy raft aquaponics | Making Stand for my 2ft LED

diy raft aquaponics


Simple DIY stand for my 2ft DIY LED light set.

The materials are all from Daiso ($2 shop)

Cut into couple of pieces

Cut small hole to sit on the glass edge

Nail it together, top view

Side view

Place it on top of the tank


Do you find information about diy raft aquaponics are you looking for? If not, below may help you find more information about the diy raft aquaponics. Thank you for visiting, have a great day.
Read More..

Friday, March 11, 2016

diy aquaponics blueprints | Making smoked foods Brining and smoking

diy aquaponics blueprints


It seems that brining is really important.

Its soaking food in a salt water solution.

Gratuitous smoked rib shot from last night
From here on in, it gets a little hazy.

Last night I made a brine of water sugar and salt. Id tell you the proportions, but I dont know what they are. It started with a half cup of rock salt and a half cup of brown sugar, and around two litres of water. But then I added some more water so I really have no idea.


Luckily, my recipe or lack there of isnt the point of this post.

This is...

Apparently brining initially adds salt to the cells in the food, then when the solution is a bit depleted, a cell might have more salt than the surrounding brine, so it starts to draw in water. From what Ive read, it might be worthwhile to figure out when that transition takes place, and remove the brine once the cells have started to turn towards taking on water, and replace it with a flavoured liquid instead of just the brine.

With this in mind, I spent a reasonable amount of time probing my whole chicken in brine with the probes of my multi-meter.

Its been an odd night.

It stands to reason that the changing salt content might change the resistance of the chicken. Resistance measures how conductive something is. Im pretty sure salt water conducts better than pure water, and less sure that perhaps pure water might not conduct electricity much/at all. Either way, there might be something useful to be gained from sticking probes into chicken.

Wikipedia says this on the subject (on conductivity, not on probing chickens)...

--------------------------------

from...  http://en.wikipedia.org/wiki/Purified_water#Electrical_Conductivity


Electrical Conductivity

Electrical conductivity of ultra-pure water is 5.5 × 10?6 S·m?1 (18 M? cm in the reciprocal terms of Electrical Resistivity) and is due only to H+ and OH- ions produced in the water dissociation equilibrium.[7][8] This low conductivity is only achieved, however, in the presence of dissolved monoatomic gases. Completely de-gassed ultra-pure water has conductivity of 1.2 × 10?4 S·m?1, whereas upon equilibration to the atmosphere it is 7.5  × 10?5 S·m?1 due to dissolved CO2 in it.

--------------------------------

Im not really sure why it says that. Im guessing it means something to someone, but I think its roughly agreeing with me.

So...

With this in mind, it might be possible to detect the point at which the food stops taking in salt, and starts taking in moisture.

Currently Im at the stage in my research where I find it annoyingly difficult to get a good reading. The harder you press the probes, the better chicken conducts. Im guessing this is just because theres more chicken exposed to the current, because theres more probe exposed to the chicken.

So for my next trick, Il be concentrating on the brine and its conductivity because I can completely submerge the probes, and as a result, I might get more consistent readings.

Im also at two more stages.

One is not being sure what I should be looking for in the readings. ie how whats happening should effect the conductivity of the readings.

And the other is wondering if perhaps I should just have a bit of a lie down, and forget the entire episode.


120 Things in 20 years - Maybe the reason aliens are always probing things is because they are trying to ascertain the correct procedure for brining and smoking everything. Aliens like making smoked foods.


Do you find information about diy aquaponics blueprints are you looking for? If not, below may help you find more information about the diy aquaponics blueprints. Thank you for visiting, have a great day.
Read More..

diy biofilter aquaponics | Making smoked foods Tin can smoker Cold smoke

diy biofilter aquaponics


I thought Id try to get the food to a place where I had a little more control over the temperature. In my first experiment with my tin can smoker, the device was inside the BBQ, and contributed quite a bit of heat. I suspect the BBQ was at around 50c, which is perfect if you want to breed bacteria.

Id prefer not to.

I figured I might be able to create smoke by just dry frying some wood chips, and I think it shows some promise.


I put the can on the wok burner and ran it on high for a bit before adding some hickory wood chips.

In this photo I used a flash so as to not distort how much smoker there was. Its a dull day, and if I took it without the flash, I would have captured half a second of smoke instead of 250th of a second or whatever flashes really run at. [Which is why you cant see much of the flame]

Probably much much faster.


Anyway...

It worked a treat.

A total successful test, and only took about 5 minutes to start smoking, and be ready to use. It might even be possible to just move it inside the BBQ now that its going, and the BBQ heat night keep it going.

That might mean it will be useful as a cold smoke maker, and a hot smoke maker.

I guess I should write some stuff on what smoking is all about instead of jumping right in with a smoker. Sometimes I forget Im supposed to be writing about this stuff, and just get on with the learning.


120 Things in 20 years Making cold smoke in a tin can smoker on a wok burner may just be the 2nd success in a row. Im not sure thats ever happened before.

Do you find information about diy biofilter aquaponics are you looking for? If not, below may help you find more information about the diy biofilter aquaponics. Thank you for visiting, have a great day.
Read More..

Sunday, March 6, 2016

diy aquaponics indoor | Making smoked foods Soldering iron cold smoker

diy aquaponics indoor


I bought some very inexpensive cuts of chicken labelled "Breast roasts for two" from my local supermarket.

They appeared to me to be a prime candidate for value adding.

I brined them in a solution of water, salt, sugar, pepper, and some lemon juice. I also threw in a couple of bay leaves. I have no accurate record of the measurements used.

Measurements are a tricky thing, because you cant rely on one batch being the same as the next. The amount of meat, and its existing water and salt content create differences. You can probably ignore the existing levels, but the amount of meat being brined changes things a lot. The result is you cant just say x amount of water needs y amount of salt.

As I understand it, the process of absorbing the salt and sugar is done by osmosis. Salt is removed from the water, so the amount of meat in the brine changes how much salt is left in the brine. The result is the solution might need to be stronger to brine more meat. Irregular shaped meat like my chicken breast still on the bone, requires a bigger amount of water to cover it.

The good thing is, it will probably work well no matter what you do, but it does make a recipe a bit pointless.

That being said I used about 6 litres of water and a bit over half a cup of both salt, and sugar.

Brine your food in cold water, in the fridge.

After an hour and a half, I removed the chicken, pat it dry, and placed it into my lidded BBQ.

A 12 or 24 hour brine would have been better but I was pressed for time.

I also placed my trusty tin can full of holes inside, and jammed a 60watt soldering iron* into it at the base.

Perfect, cold smoke in minutes.

A total success.

The wood chips were from a store bought pack of smoking wood chips.


Im pretty sure this would ruin the soldering iron for soldering, but this was one Ive never used as it was way too powerful for anything I might do.

Previously I used my tin can full of holes with burning heat beads to keep it going, so I needed quite a few holes to support the combustion required to keep it alight. With the soldering iron, I can choke it down a lot more because it will never go out. I think Ill make a new tin can with less holes, and a large adjustable hole in the top by way of two lids with large holes that I can rotate to make whatever size hole I need. This should allow total control over how much smoke is made, and with some marks on the lids, I should be able to keep a record of what setting it was on, and what worked and what didnt.

But it does seem that everything works, no matter what you do so dont be too stressed over recipes and instructions. Just have a go, and you wont be disappointed.


120 Things in 20 years - Should have done a bit more research before trying to make a cold smoker because a soldering iron works really well.


*using a soldering iron for a cold smoker is NOT an original 120 things idea

Do you find information about diy aquaponics indoor are you looking for? If not, below may help you find more information about the diy aquaponics indoor. Thank you for visiting, have a great day.
Read More..

Saturday, March 5, 2016

diy aquaponics dwc | Front Gutterbed Making a smaller setup

diy aquaponics dwc


Since my backlane CRAFT set was completed last week, I can redo the front set into something smaller or repurpose it into a test bed.
I need to test further into possibility of mosquito breeding in my set, from initial trial it is not a problem. However it is good to be safe then sorry.
All plants removed and placed in a temporary tray.
Gutter all emptied and drained, Ill only use two leaving room on the rack to try out something else.
This FrankenRack need redo, few additional angle iron from the back lane project will be enough.
Water needs to be drain from the tank and fish safekeep into the round container in foreground.
Fast forward, after four hours the new set with two gutterbeds completed. Racking redo to make it more compact and stronger.
Each of this gutter require 500 Liter/hour pump before considering the height require. Actual inflow should be around 250 liter/hour the most. The two gutters add up to 1000 liter/hour, so a 1000 liter/hour pump is use. This pump consumes 14 watt of electricity for it operation per hour.
Siphon use existing unit, no issue there.
Completed set, netting in place to ensure fish contained inside since they like to jump whenever in new surrounding.

Ill use this set for few test, one test is to see how reliable the smaller pump is. Another is Strawberry, I can start planting it again in this setup. Previous trial was using traditional growbed.

So there goes, the front set.


Do you find information about diy aquaponics dwc are you looking for? If not, below may help you find more information about the diy aquaponics dwc. Thank you for visiting, have a great day.
Read More..